

Where
Services → Storage. If you have no buckets the page says No bucket yet. Click New bucket.Steps
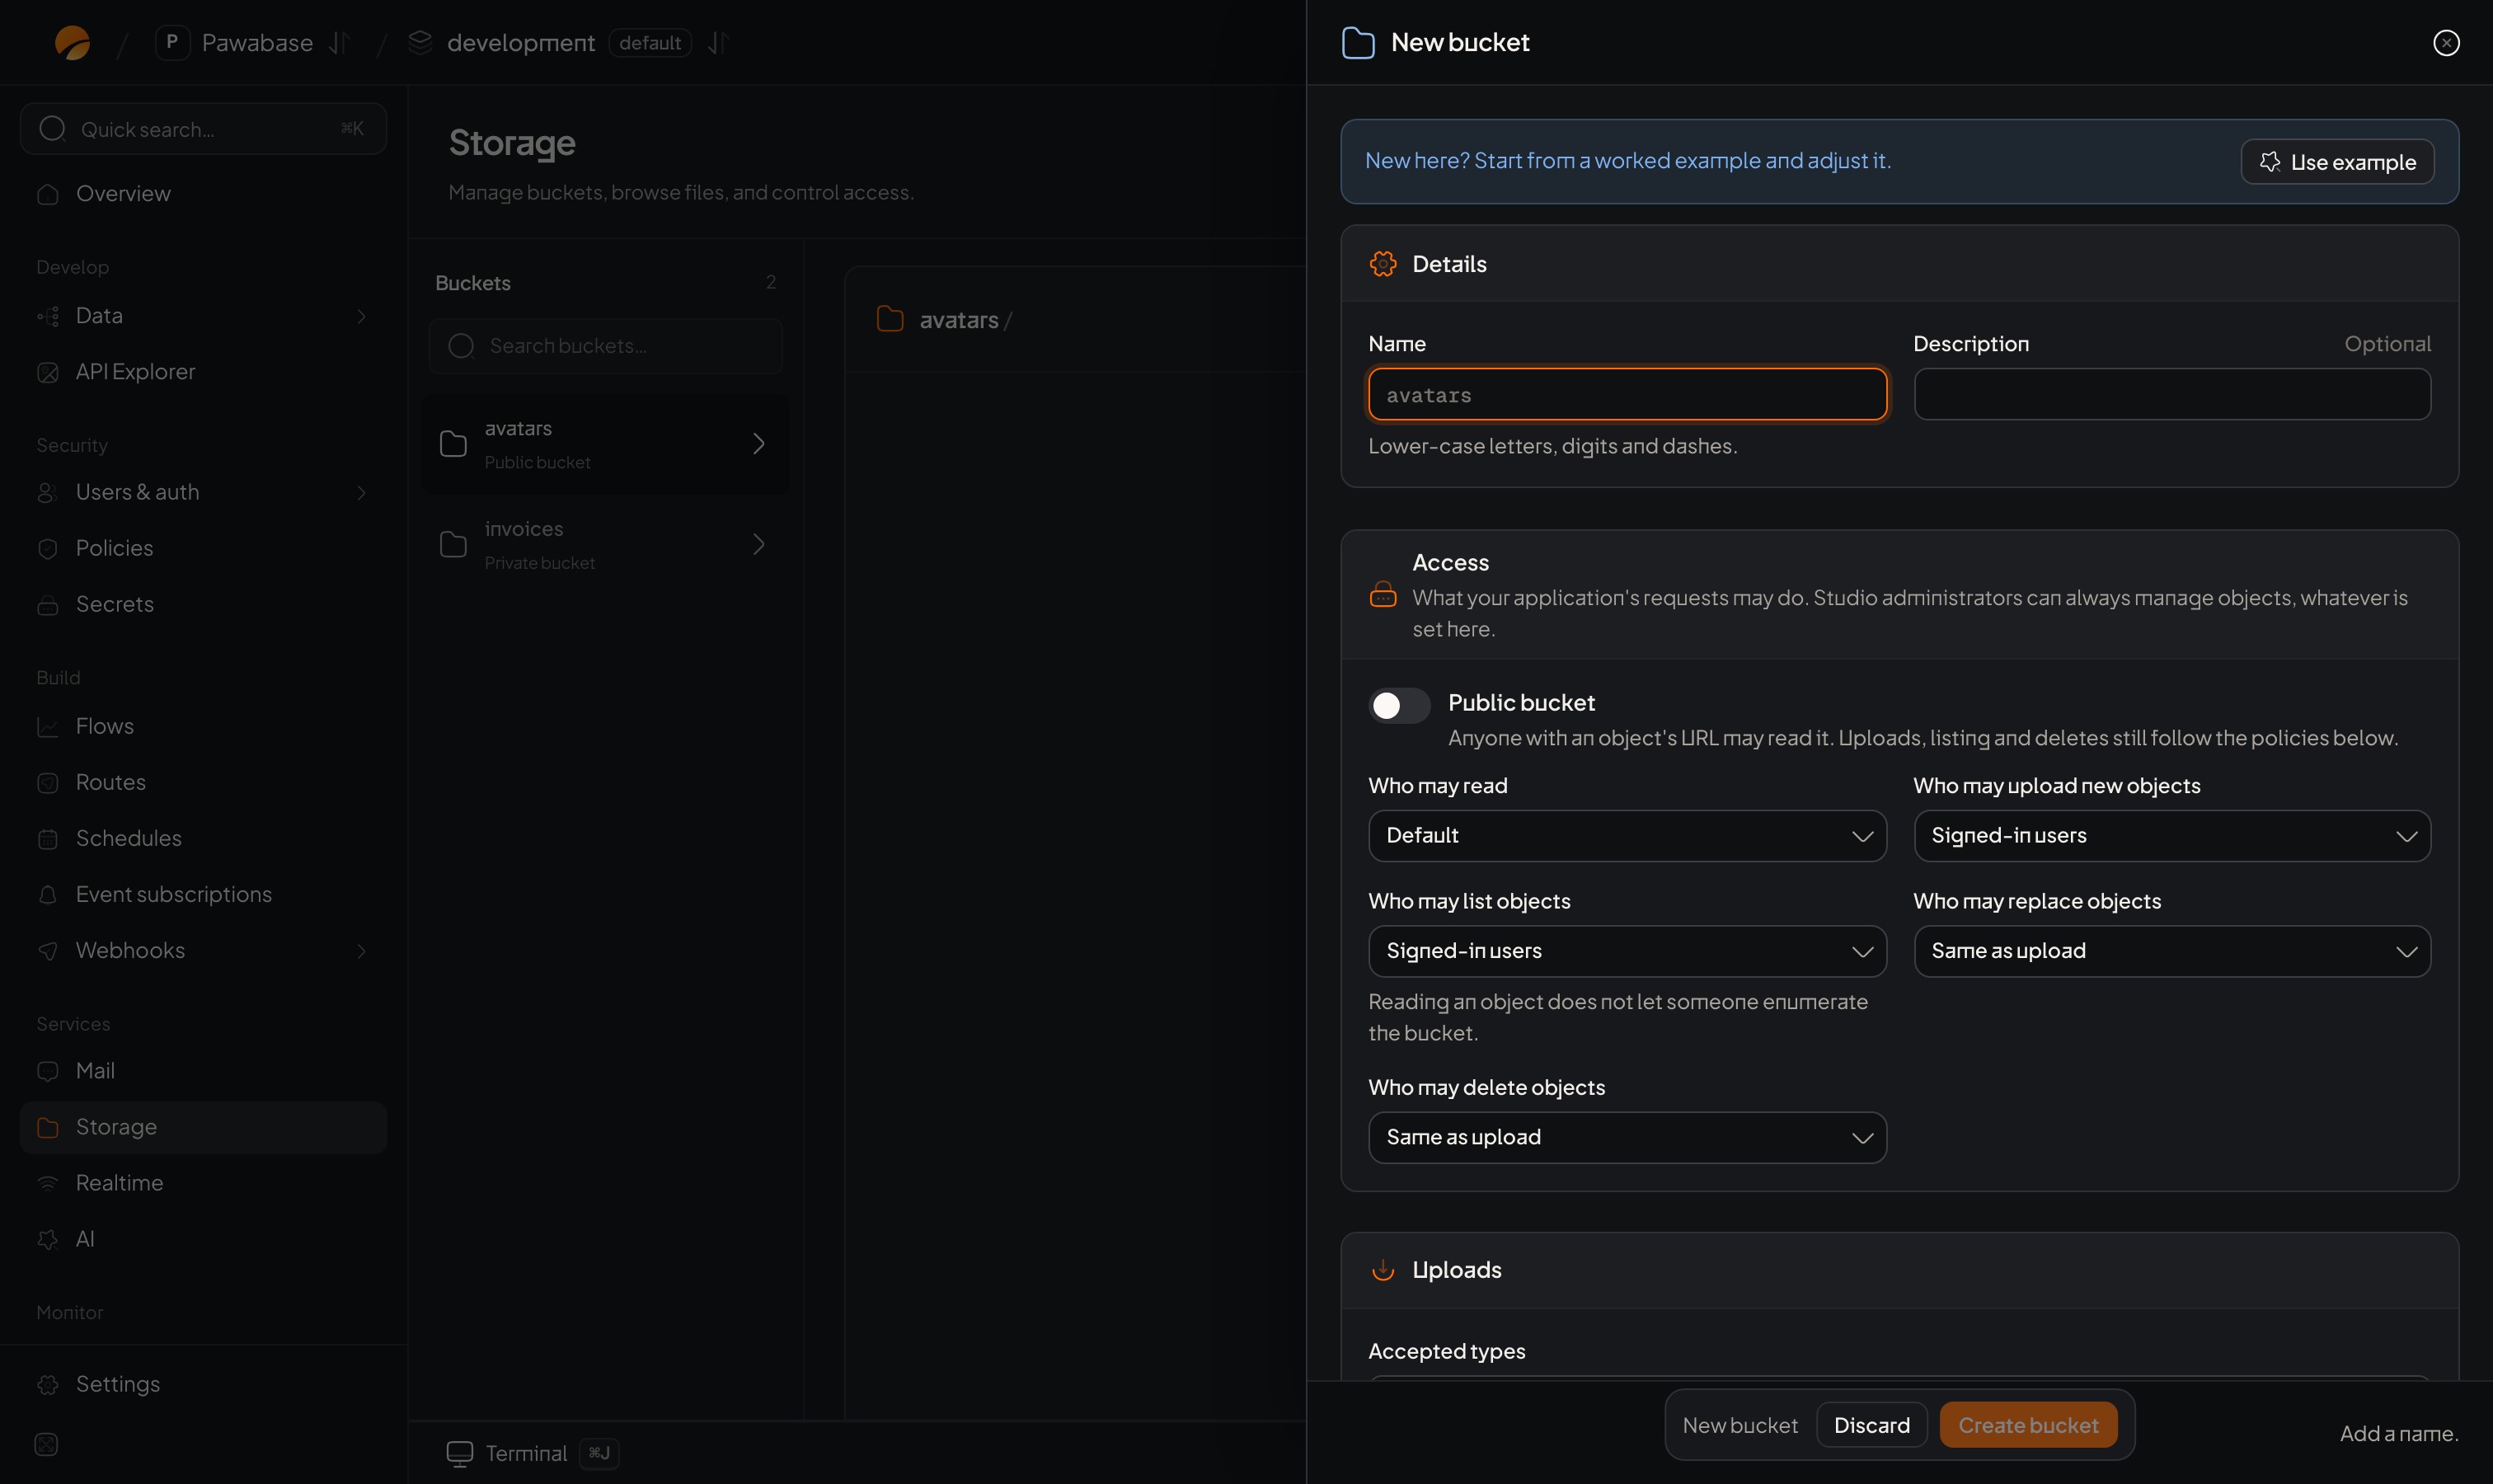
Services → Storage → New bucket: Details and the Access section.
1
Name it
Name: lowercase letters, digits and dashes (for example
avatars, documents, exports). It is unique within the environment and can’t be changed later. avatars in development and in production are separate buckets with separate files.2
Choose public or private
Turn Public bucket on if anyone with a file’s address should be able to read it (avatars, product images). Leave it off for anything private. Uploads, listing and deletes always follow their own rules, whichever you choose.
3
Set the five rules
Who may read, Who may upload new objects, Who may list objects, Who may replace objects, Who may delete objects. Each uses the rule picker. Start from the table below.
4
Limit what can be uploaded
Under Uploads: Accepted types and Largest file. See Bucket settings.
5
Create
Click Create. The bucket is ready at once.
Common set-ups
“Own folder” is the custom rule
$object.segments.0 equals $auth.user_id; “same organization” compares $object.segments.0 with $auth.org. See Who can do what and Rules on storage.
Change a bucket later
Open the bucket and use its settings. You can change any setting except the name. A rule change applies to new requests within seconds.Delete a bucket
Deleting a bucket removes its configuration; the files should be removed first. In the file browser delete files and (empty) folders, then delete the bucket. Take a backup if you may need them.How many buckets?
Use a separate bucket when the rules or limits differ: public vs private, images vs documents, user files vs server-written exports. Use folders (key prefixes) inside a bucket for everything else: per user, per organization, per year.Bucket settings
Every field.
Browse files
Work with the contents.